

From the earliest writing systems, the history of civilization has been closely intertwined with the evolution of information systems. Chinese invention of papermaking and later Johannes Gutenberg's printing press enabled accumulation and sharing of human knowledge. In the 20th century, the emergence of computers accelerated this, transforming information system from handwritten documents into digital data. This digital revolution was more than a shift in storage; it sparked a massive increase in both volume and velocity of recorded information.
In response, Oracle introduced its first commercial database product in the early 1970s, bringing Codd's relational database theory into practical application. Today, Oracle database stands as one of the fundamental pillars of modern government and business systems, playing an integral role in transaction processing, data warehousing, and business intelligence applications.
![]()
Oracle XE (Express Edition) is a lightweight, free-to-use version of Oracle database, designed for development and small-scale deployments. The latest release, 21c, supports up to two CPU cores, 2 gigabytes of RAM, 12 gigabytes of data storage, accommodating up to 3 pluggable databases. For deployments that grow beyond these limits, Oracle provides a seamless upgrade path to the Standard or Enterprise Edition. This makes Oracle XE an ideal choice for developers prototyping their database applications, as they can scale up when their needs expand.
How to Install Oracle XE on Your PC?
System requirements for Oracle Database XE 21c are as follows:
- Operating System: Windows 10 x64 - Pro, Pro for Workstations, Enterprise, and Education editions
- Disk Space: 8.5 gigabytes minimum for Oracle software, plus 2 gigabytes or more for data storage
- RAM: 2 gigabytes RAM minimum
Before proceeding, please ensure that you are logged into Windows with Administrator privileges. Additionally, check if the ORACLE_HOME or TNS_ADMIN environment variables have been configured on your machine. If they have already been set, please delete them before continuing.
Let's navigate to the software downloads page on Oracle's website and download the Oracle Database XE for Windows (ZIP). Once the download is complete, extract the ZIP file. Inside, you'll find the "setup" icon. Double-clicking it will start the Oracle XE installation process. Click "Next >" to proceed.

Read the license agreements for Oracle Database 21c Express Edition. Then select "I accept the terms in the license agreement," and click "Next >" to continue.

Subsequently, you can select the destination folder for installation. This file directory will be where software source files, database files, and logs are stored. By default, it will be located at C:\app\<username>\product\21c.
- C:\app\<username>\product\21c\: Oracle Base. This is the root of the Oracle XE directory tree.
- C:\app\<username>\product\21c\dbhomeXE: Oracle Home. This is where the Oracle XE is installed. It contains the directories of the Oracle XE executables and network files.
- C:\app\<username>\product\21c\oradata\XE: Database files.
- C:\app\<username>\product\21c\diag\rdbms\XE\XE\trace: Diagnostic logs.
- C:\app\<username>\product\21c\cfgtoollogs\: Database installation, creation, and configuration logs.

If you want to select a different installation directory, click "Change." In the case, please make sure that the directory do not include any spaces or non-Roman alphabet characters.
Next, in the Oracle Database Information window, enter and confirm the single database password to use for the SYS, SYSTEM, and PDBADMIN database accounts. Password recovery is not easy, and any unauthorized access or file modification without proper knowledge could result in data corruption. So, please select a secure yet memorable password.

Lastly, in the Summary window, please review the installation settings and click "Install" to begin database installation, if you are okay with them. Otherwise, click "< Back" and modify the settings as necessary.

After a few minutes, the installation will be finished. Make a note of the connection strings provided for multitenant container database, pluggable database, and EM Express URL. Click "Finish" to close the installer.

Post-Installation Setups
Understanding Multitenant Architecture of Oracle Database
Starting with version 12c, Oracle introduced the concept of multitenant architecture, also known as the pluggable database. In this architectural model, there is a single comprehensive database, called the container database (CDB). The container database itself doesn't contain any database objects, but just functions as the root database. Within the CDB, there are multiple pluggable databases, each possessing the full functionality of a standalone database, including its own users, objects, tables, applications, and more.

In earlier versions like 11g, every database required its own dedicated server. For example, if your company maintains databases for HR, customer orders, and sales history, a separate server needs to be allocated for each. However, this approach is highly inefficient, burdening database administrators (DBAs) with heavy workloads and companies with significant amount of server costs.
To address this, Oracle re-designed its architecture to allow a single container database to have multiple pluggable databases. This change enables the hosting of many databases, each serving a specific task, within a single root container residing in a single server.
Installing Oracle Sample Schemas
For those new to Oracle Database, self-learners preparing for Oracle certifications, or developers working on database applications, Oracle sample schemas are a valuable resource. They are pre-populated database structures that simulate real-world business scenarios, containing tables, views, indexes, and other objects. You can install it to benefit from a practical, hands-on approach to learning and experimenting with various database concepts and technologies.
Navigate to the GitHub repository and download the "Source code (zip)" file for the latest release of the sample schemas. After downloading the file, extract it, and relocate all the contents to the directory path: C:\app\<username>\product\21c\dbhomeXE\oradata\sample\. If you specified specific installation path for the installation, locate the contents files to \oradata\sample under Oracle Home directory.

Next, open a new Windows Command Prompt and cd into the schema folder. For example, to install HR schema:
cd <oracle_home>\sample\HR
Connect to the CDB with a privileged user:
sqlplus / as sysdba
This command connects you to the root container (CDB$ROOT) of the pluggable database as the SYS user. You can query V$DATABASE view to verify this:

Now, let's retrieve the list of available PDBs by executing the query: SELECT NAME FROM V$PDBS;

Next, alter the current session to your selected PDB, which in my case is named XEPDB1:

Then run the @<schema>_install.sql script. For example, to install HR schema:
.PNG)
During the installation, you will be prompted for:
- Password: Enter an Oracle Database compliant password
- Tablespace: If you do not enter a tablespace, the default database tablespace is used.
Note that if the schema already exists, it is removed/dropped and a fresh schema is installed. After installation, type EXIT to quit SQL* Plus. You can install the other schemas using the same way.
Creating New User
During the sample schema installation process, new users HR, CO, and SH are created. These three users, however, are restricted to their respective schema objects. To fully take advantage of all three schema objects, you may consider creating a new user who has access to objects across all three sample schemas.
To create a new user, open a new Windows Command Prompt and start SQL*Plus. You will be prompted to enter a username and password. Enter system as the username and the password you specified during installation (inside quotes.) This will connect you to the root container.

Subsequently, alter session to your pluggable database. Then, create a new user by entering the following command (after replacing username ora_dev and password pw1234):
CREATE USER ora_dev IDENTIFIED BY pw1234;
Next, grant unlimited tablespace and DBA privilege to the newly created user.

This would probably not be something that your typical production DBA would do. Tablespaces are collected by database administrators. A typical DBA generally creates uniquely named tablespaces and carefully allocates space quotes to them. We, however, aren't concerned with any of that for now.
Oracle SQL Developer
Oracle SQL Developer is a powerful and versatile frontend application designed to interact with Oracle Database. Head over to the SQL Developer download page on Oracle's website and download the version for Windows 64-bin with JDK included. Once the download is complete, extract the ZIP file to your preferred destination. You'll find the "sqldeveloper" icon in the folder. Clicking it will open the application; no further installation is required.

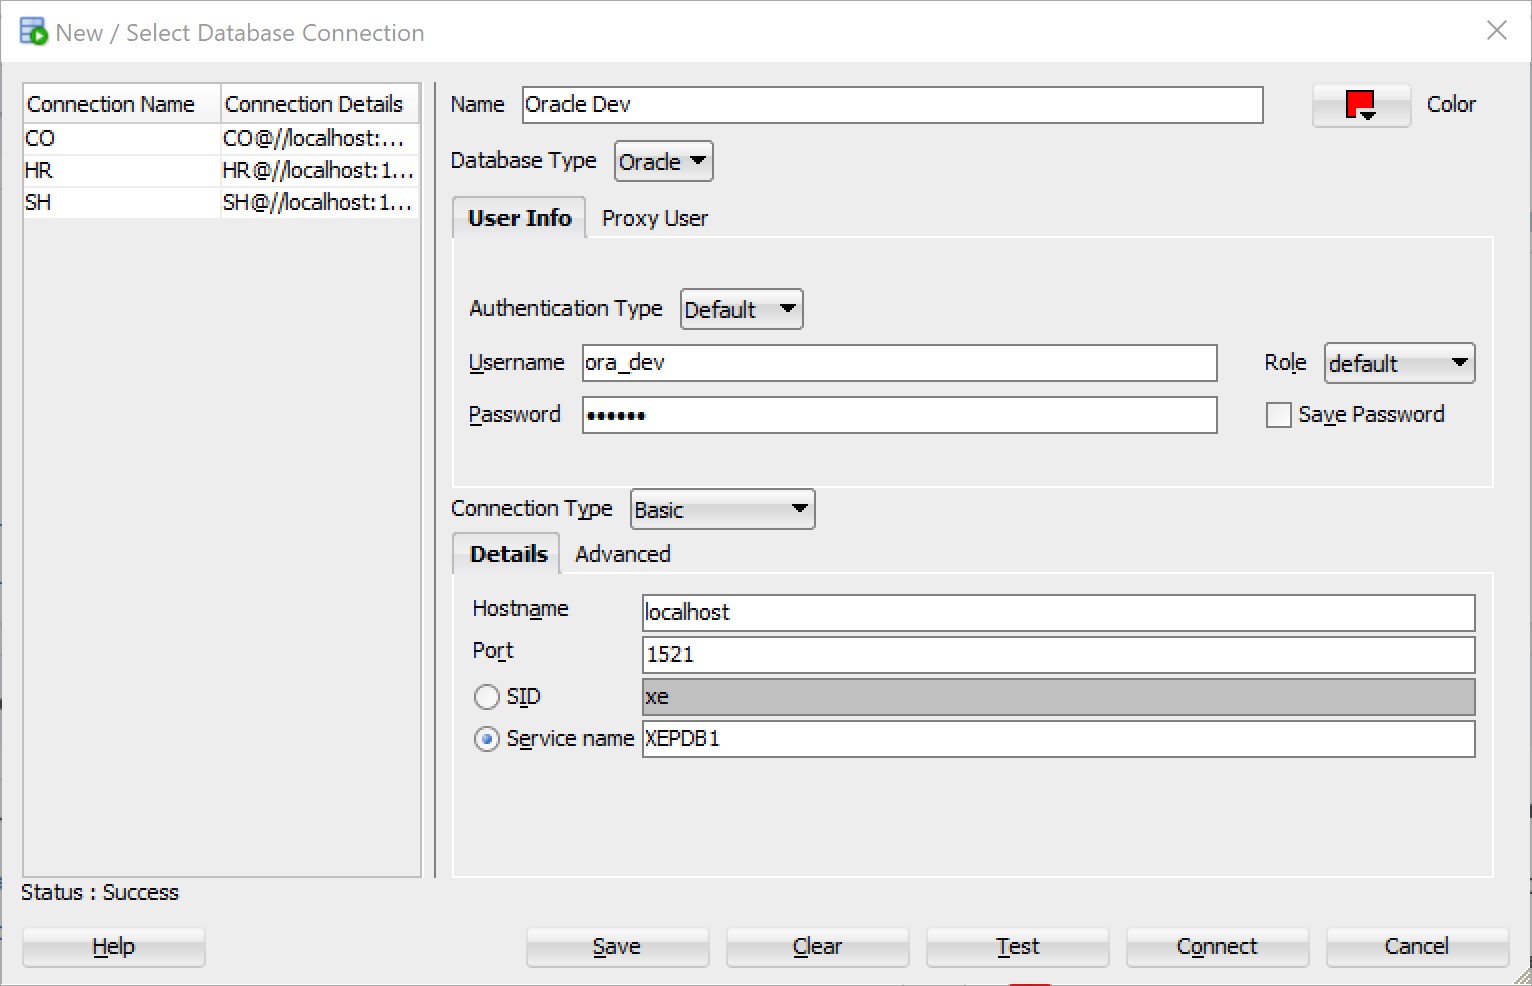
On the upper left corner, click the "+" button to create a new database connection. Then in the "New / Select Database Connection" window that appears, enter the Name (connection name), username (the database user created when you ran @hr_install.sql for example). Optionally, you can specify the color for the appearance of your connection. Next, select "Service name" radio button and enter the PDB name where the user object resides (e.g., XEPDB1.)
Click "Test" button to check if the connection is valid. If you see the message "Status : Success," click "Save" to save the connection settings and "Connect." Entering HR and its password will connects you to the HR schema.

Similarly, you can connect to the other schemas. For example, to connect to the ora_dev user that we created earlier:
This user have an access to all three sample schema objects. For example:

First Look at Oracle SQL Developer
Let's take a brief look at how to use the SQL Developer. On the menu bar, click "SQL Worksheet" button to open a new SQL worksheet with a connection. This is the main place where you can write your SQL codes.

Right click on the left side of the worksheet and select "Toggle Line Numbers," for better interface.

On the left-hand side panel, you'll see a section named "Connections." This section lists your established database connections. Each connection, when expanded, displays database objects, such as tables, views, or indexes.
If you click on an object, SQL Developer will open a new tab that describes the object.

Dragging-and-dropping a table or view object will automatically generate a draft statement for common tasks.

You can also use its GUI to create a new table. Right click on the "Tables" folder and select "New Table...". In the new window that appears, you can select schema where the new table will be located, specify the table name, and define its columns.

Oracle SQL Developer also supports auto formatting, which automatically arranges the appearance of your code. The shortcut for auto formatting is [Ctrl] + [F7], by default. To modify the formatter settings, go to "Tools" → "Preferences..." on the top menu bar, and select "Code Editor."

Run Statement vs. Run Script
After writing an SQL query, you can click either "Run Statement" or "Run Script" button on the worksheet. Basically, the "Run Statement" button will run the selected SQL statement in the worksheet, while the "Run Script" button will run the entire SQL script on the sheet. For example, let's take a look at the following SQL script.

This script creates a new table with a single column, inserts a data value into the table with a commit, retrieves all rows from the table, and finally drops the created table. Now, let's click the "Run Script" button and see what happens.

We see that the entire statements were executed in an order. On the other hand, the "Run" button only runs the selected statement. For the SELECT statement, it will show the query result in a new tab. For example:

However, if you select the entire script and click the "Run" button instead of "Run Script," you might not see any retrieved results. This happens because there are two different threads happening: one selects the data and the other drops the table. So, depending on which gets there first, you won't have any data to retrieve. If the table is dropped first, then there is no data to select.

Uninstalling Oracle Database
If you have followed the installation process as outlined so far, there should be no issues. However, in case where you do encounter any problems, it is good to know how to properly uninstall Oracle so you can reinstall it.
On your Windows PC, navigate to the "Control Panel." Then select "System and Security" - "Administrative Tools" and "Services" and click "Stop" on any services that starts with "Oracle."

Next, navigate to Oracle Home directory, which is: C:\app\<username>\product\21c\dbhomeXE. You'll find a folder named "deinstall." Open the folder and run the "deinstall.bat" file as administrator.

In the Windows Command Prompt that appears, specify the Oracle Database listeners and the name of the database that you want to delete (it will show up inside the brackets.) Then enter y to delete the database.


0 Comments